Fabric painting is one of my favourite projects. I am always impressed with how this simple design idea turns out no matter the skill level of the children. This easy fabric painting project can be done with ages as young as 5 or 6 years old. In this art lesson we used ‘Zentangle‘ designs for fabric painting on tote bags and T-shirts that the kids were so excited and proud to wear home.
The little artists that designed these bags and t-shirts were 6-8 years old.
What is a Zentangle design?
First we discussed what lines and patterns are, and I introduced them to the world of Zentangle patterning.
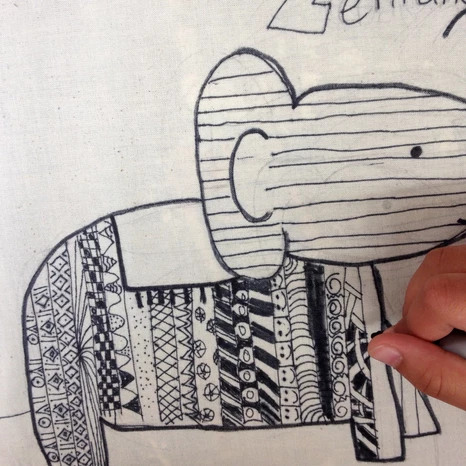
Some people call it Zendoodle. A Zentangle is the act of drawing a variety of patterns and lines to fill an entire shape or space, the act of repetition can be quite therapeutic and relaxing, hence the ‘zen’ attachment to the term.

Easy Zentangle Animals Design For a Fun Fabric Painting Art Project For Kids
So once we understood what Zentangles were, we talked about animal shapes.
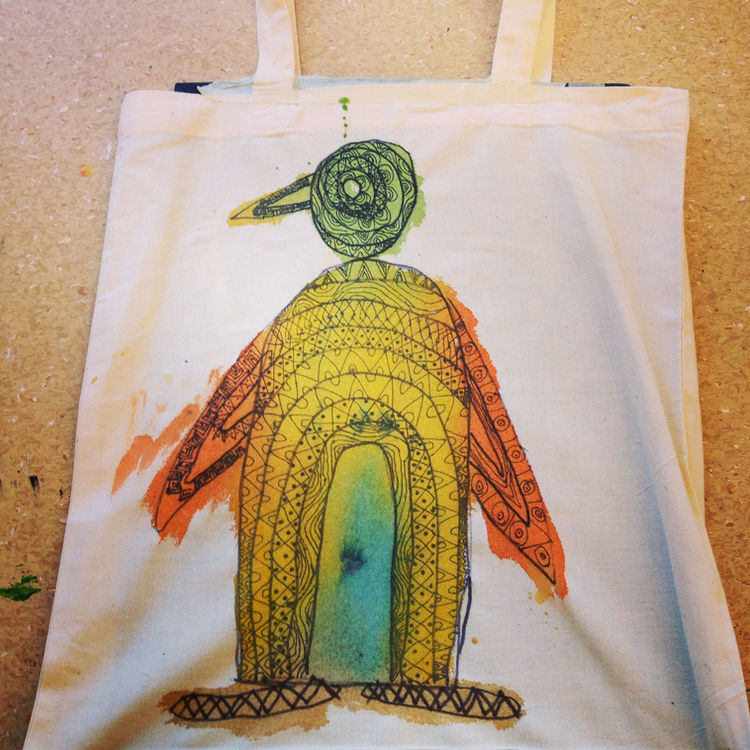
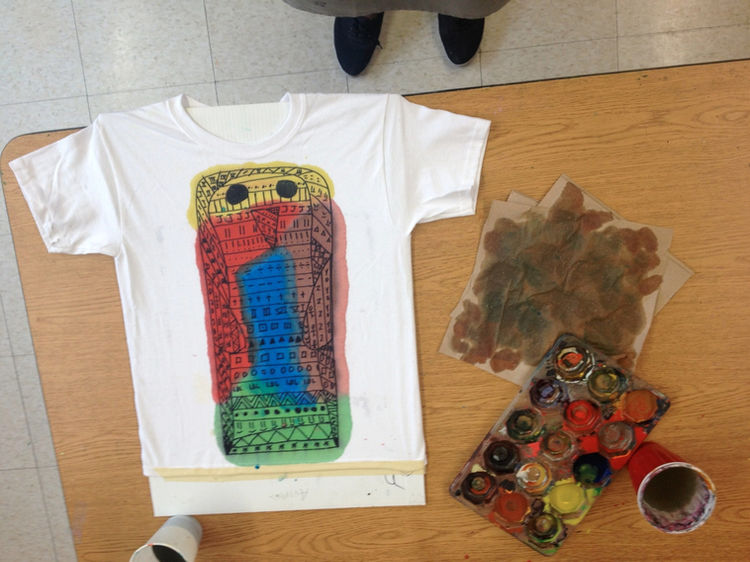
With the younger kids we all decided together on what animal the class would draw, in this case it was a penguin.
I then showed them how to draw a basic penguin with about 5 or 6 easy shapes that they could then draw by themselves.
The older kids chose their own animals and I showed them the book “Draw 50 Animals” by Lee J. Ames which is a great book filled will an easy step by step on all types of animals.
What You’ll Need:
- Blank Canvas Tote Bags or Plain White T-shirt
- Black Sharpies
- Acrylic Paint
- Paint Brushes
- Water
- Cardboard or Corrugated Plastic Boards
- A3 Paper
- Pencils
- Masking tape
What To Do:
1. Sketch The Design
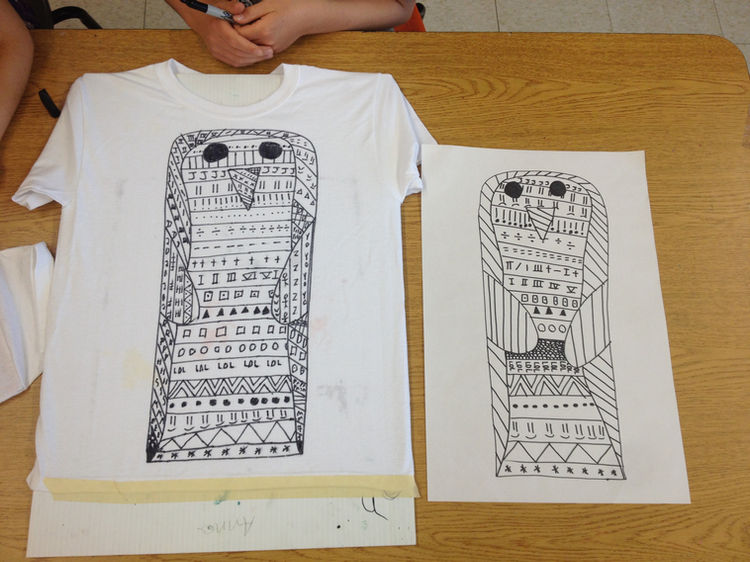
After the animals were chosen, they each got a piece of paper roughly the size of the bag or t-shirt they’d be using.
With black sharpies, they drew their rough copy onto the paper with all the zentangles.
Rough copies are important for this project because they will surely make mistakes and it prevents tears when you say “No” to starting over on a new bag or t-shirt.
2. Draw On The Fabric
Once their rough copies are approved by me, they can receive a bag or t-shirt and a board.
We used corrugated plastic boards because it doesn’t absorb the paint/water and does well to prevent leak-through to the other side of the shirt/bag, but cardboard works fine if that’s all you have.
They insert the board and tape the fabric taut and flat. I help the younger ones with this step.
3. Paint
It’s painting time! They use their paper designs to copy from and start painting on their fabric bag or t-shirt.
This project is done with acrylic paint, it works just as good as fabric paint does and is far more affordable.
It’s best to dilute the paint quite a bit for this project, the colours will spread better and the lines of the sharpie show up nicely.
If the paint is too thick, or even matches the consistency you’d normally paint with, the colours won’t spread well, and over time the paint will start to flake off.
Watery acrylic paint is just better, trust me.
By the way, you can wash the bags and tees as normal. It will not affect the designs in the slightest. My design has remained with the same vibrancy since when I made it 5 years ago!
