If you haven’t heard of Kimmy Cantrell, then you’re really missing out on an incredible contemporary artist that everyone should know about. Whether you prefer sculpture, drawing or painting, this artist has it all.
I introduced my students to Cantrell’s work and it was the perfect transition from Picasso to mask making. Looking at his work, isn’t it clear why it worked so well?
I literally stumbled across his work about a week before I was going to introduce African mask making. How perfect is that!? I scrapped my original idea and changed my lesson plans to incorporate this artist instead to create our own paper masks.
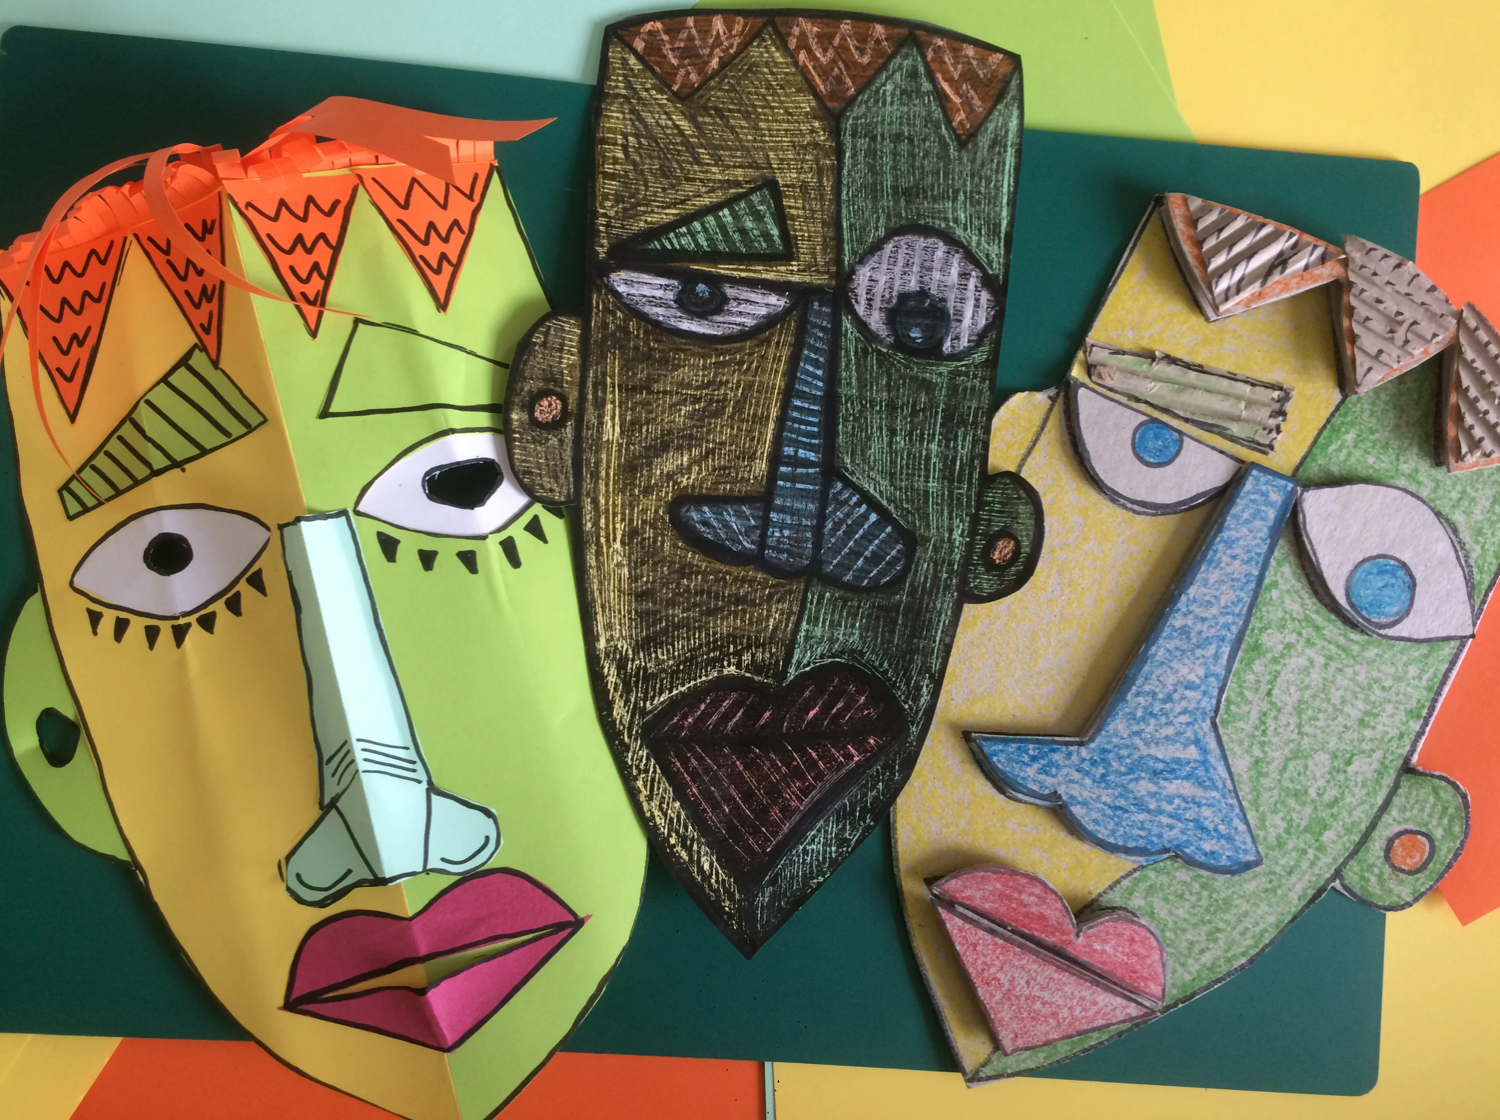
Paper mask projects inspired by cubism
To put things into context, I explained to my students that Cantrell had a very “Picasso-y” feel to his work and reintroduced the ‘cubism’ and ‘portraiture’ vocabulary. It’s almost as if Cantrell took inspiration from his African American heritage and mixed it with a cubism flavour like the Picasso portraits we painted earlier.
And with this, Cantrell creates beautifully strange faces from clay and wire, which were a hit with young Primary school kids.
We watched this video of the artist explaining his work and ideas before we began making our own Kimmy Cantrell inspired paper mask projects.
My school has tons of clay, but no kiln.. so.. although I would have loved to make clay masks like Cantrell, instead we used my favourite medium. Paper!
In order to accommodate the skill level of each year group. I tried to create a way to make masks or mask type pictures in a few different ways for each year group to try.
By the way, this lesson is a PERFECT symmetry lesson!
Year 4 (the 8-9 year olds) made paper origami masks, Year 5 (the 9-10 year olds) made mask pictures using the crayon wax scratching technique, while Year 6 (the 10-11 year olds) made masks from cardboard.
Origami Masks

What You’ll Need:
- Card stock paper – Assorted colours
- Pencils
- Scissors
- Glue sticks
- Markers
- Tissue Paper (optional)
- Feathers (optional)
What To Do:
How To Make a Kimmy Cantrell Inspired Origami Mask
1. The FACE
Fold card stock in half (portrait way) and cut half a face shape.

2. The EYES
Fold both sides of the face inwards and cut some half eye shapes. Triangles work well too.

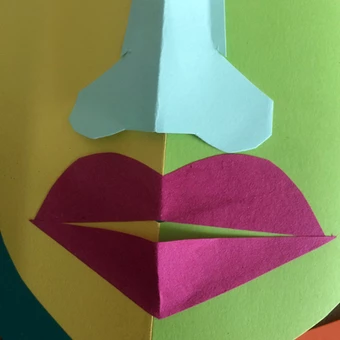
3. The MOUTH
Cut a slim shape to create the mouth. It may useful to pre-draw this to test how it will look. I also showed students some expressive mouth ideas by drawing them on the board and drawing a line down the center so they had a better idea of what half of the mouth would look like.
4. The NOSE + EARS
I used the extra scraps of paper from when we cut the face to create the nose and ears.
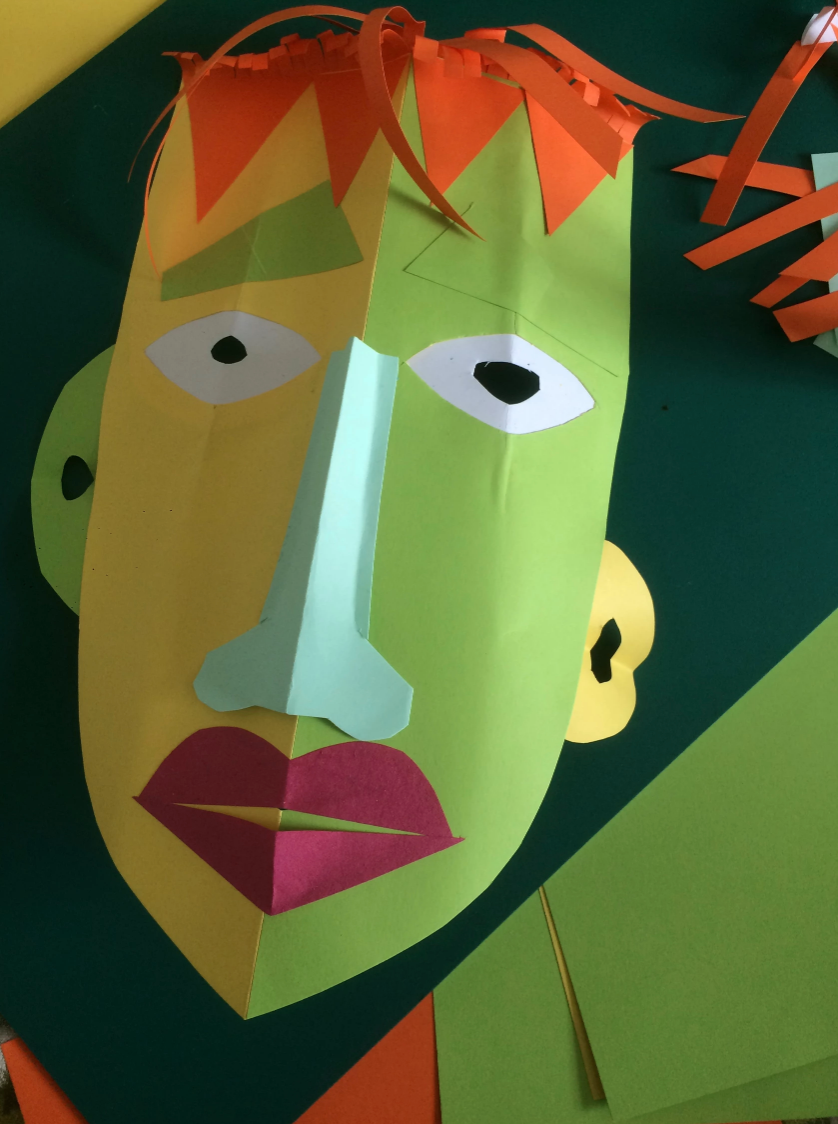
5. The HAIR
For the hair, just one way to do it is to cut some paper into a sort of fringe, by cutting skinny strips down the paper but leaving one side of the paper’s edge intact in order to keep the strips together, and to a have a place to glue it to the face. Tightly roll the strips around a pencil to curl it.
6. Decorate and add Embellishments
Add decorations with tissue paper, feathers, pipe cleaners, whatever you like! Some children used pens and markers to add other details.

Crayon Scratched Masks
I love this technique!

How To Make a Kimmy Cantrell Inspired Crayon Scratch Paper Masks
What You’ll Need:
- Paint Brushes
- Black Ink. We used some india ink and a no name ink. Use what you have.
- Card stock paper
- Scissors
- Anything sharp-ish like tooth picks, skewers, popsicle sticks, paper clips
- Crayons
- Black Sharpie
What to do:
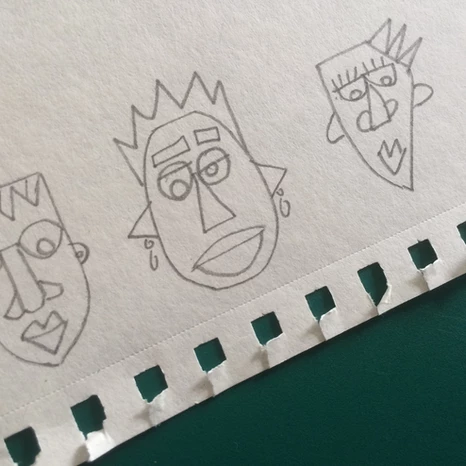
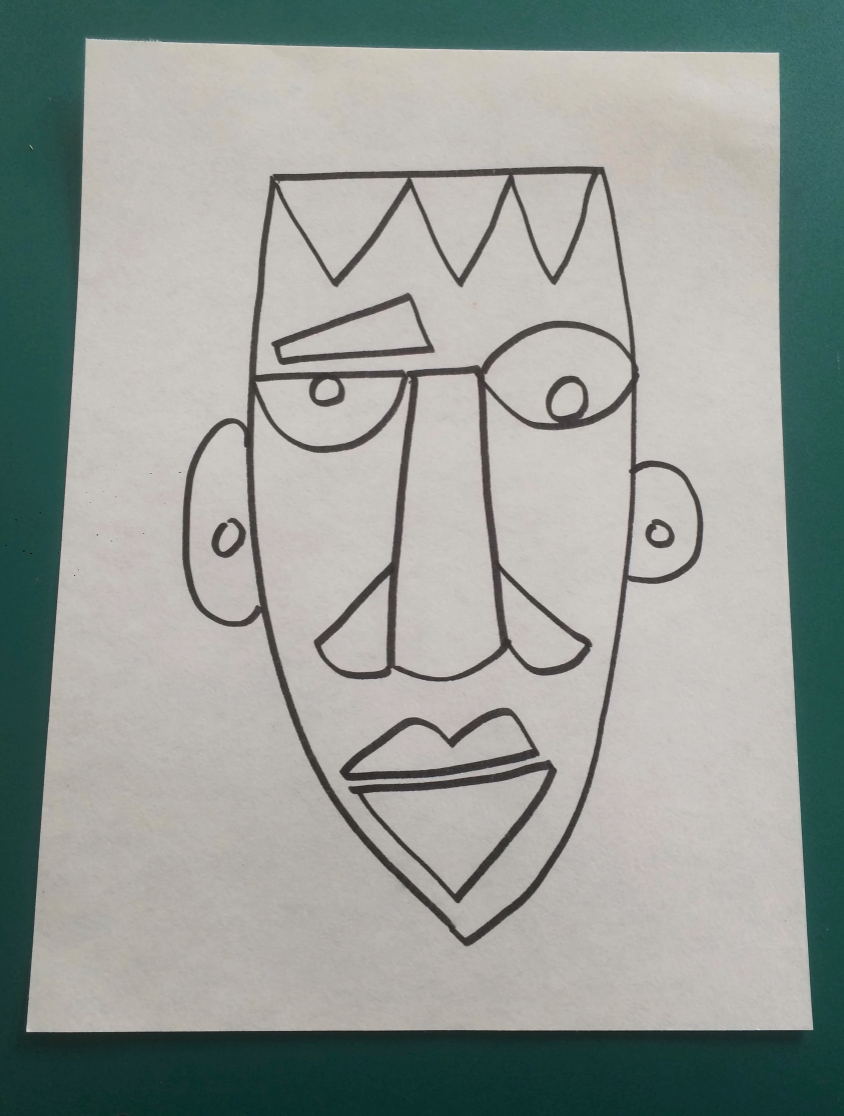
1. Plan your mask design
Again, plan the designs in a sketchbook or scrap paper plan some different face ideas. Take a look at Kimmy Cantrells page and see what types of facial features he creates the most. Draw some inspiration from that and create at least 4 face designs.
2. Draw your favourite design in black marker
With a black sharpie, draw the face onto the card stock paper.
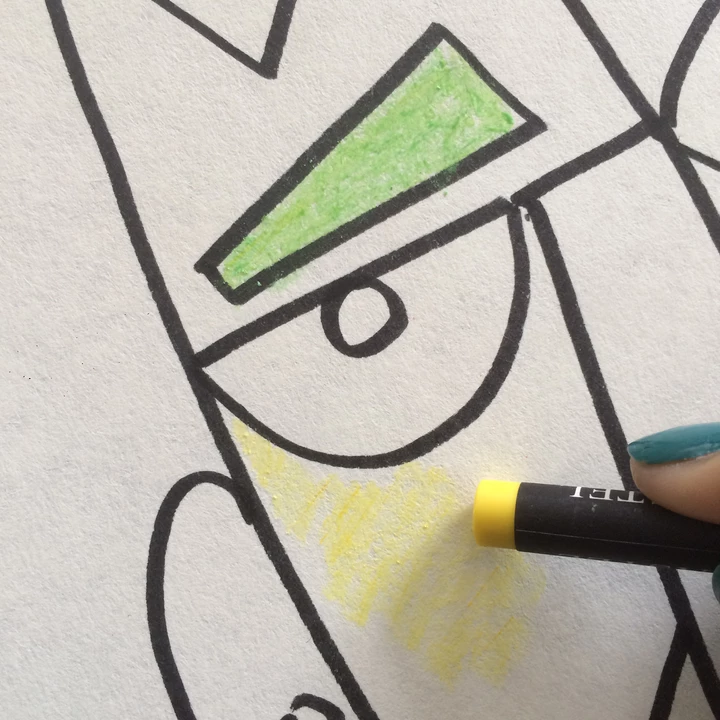
3. Colour the face with crayons
Colour the face firmly with crayons. (Remember, any spots you’d like to keep white, you’ll need to use white crayons to colour it in.)
4. Wash ink over the entire face drawing
Brush black india ink all over the face. Just one pass, you don’t want it too thick or too watery.
Then, let the ink dry. Should only take a few minutes.
Tip! I set up an inking station in one part of the room and allowed the kids to go over there to ink their portraits when they were done colouring. They left them there and I’d call them over once they were dry and hand them a tooth pick to start the scratching.
Another Tip! Give students something else to do while they wait. Or else they may just linger watching the ink dry and start chatting to their friends. I have loads of great ideas for things they can do while they wait. Take a browse through the FSF shop.
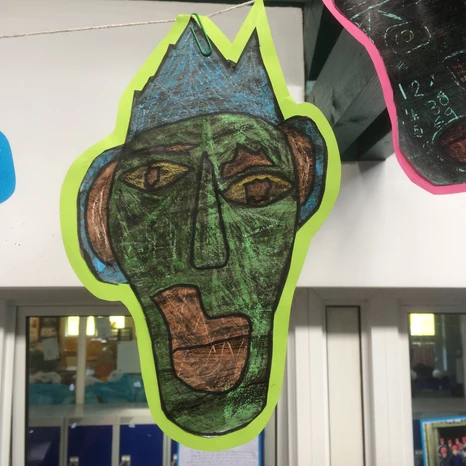
5. Scratch it out
Scratch patterns, lines and other designs into the face with the toothpick. Reveal as much of the colours as you can to create a stunning picture!
Some colours may scratch better than others, but if you only painted one layer of ink you should be fine. I found that a few students got ink happy and just completely saturated their picture. When it came to scratching they had a really tough time seeing any colour at all! 🙁
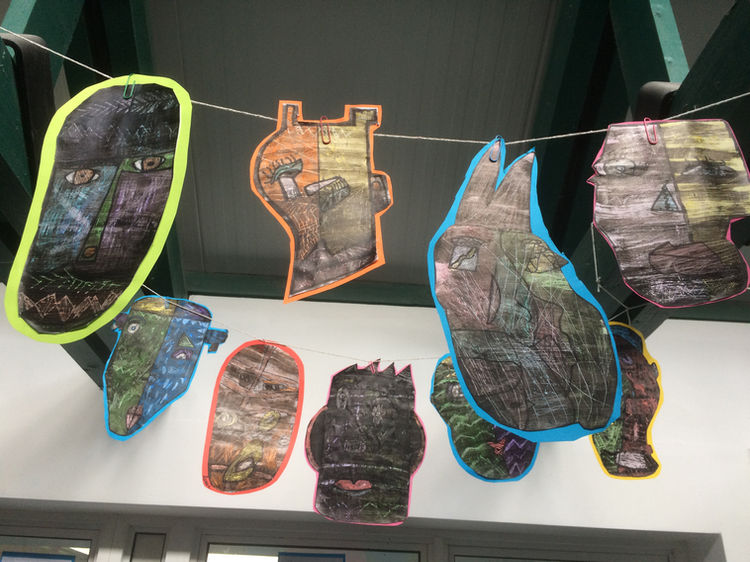
6. Cut out your mask
Cut out the face and recycle the scraps. We stuck the masks onto colourful backing paper and then cut around the faces leaving about a centimetre edge. The results look fantastic!
7. Add a stick (If you want)
You can add a holding stick on the back of the mask for if you prefer. Popsicle sticks work just fine.
Cardboard Masks
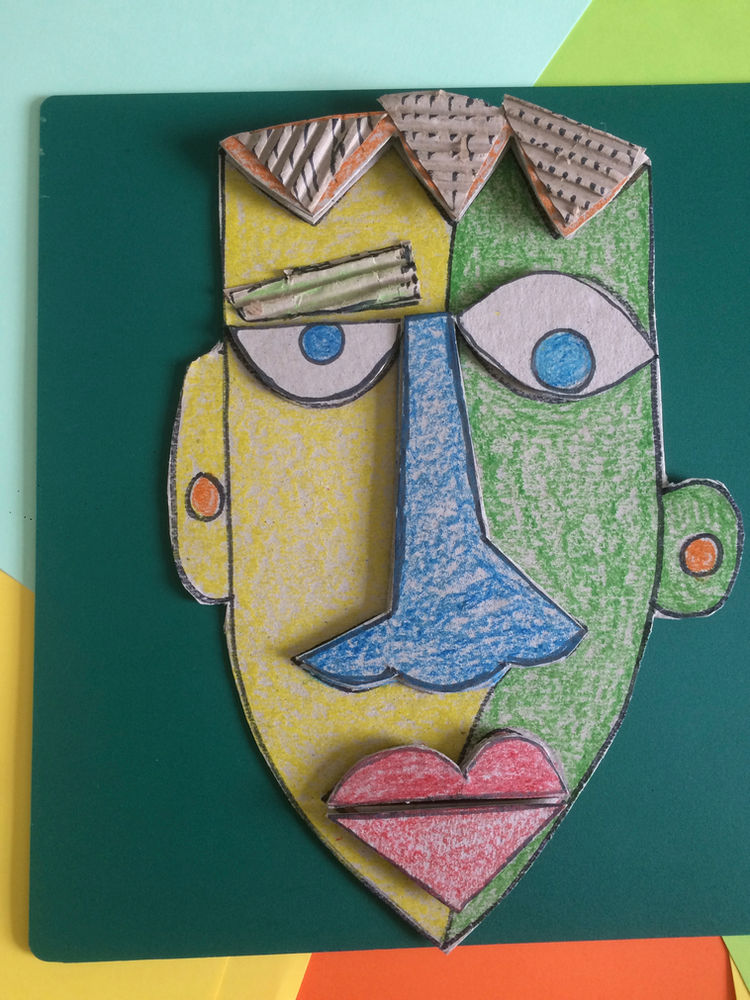
How To Make a Kimmy Cantrell Inspired Mask with Cardboard
What You’ll Need:
- Cardboard
- Scissors
- Pens & Markers
- Pencils
- Colouring materials of your choice, like Crayons, Paint, Oil Pastels
- Glue Sticks
- Craft knife (Optional)
What To Do:
1. Plan your mask design
Same as before, plan some faces in a sketchbook and choose your favorite.
2. Draw your design larger, in black marker
Draw your best/favourite face onto some plain cardboard with a black marker. (Or start with a pencil and go over it with marker)
3. Trace lines with tracing paper
Use tracing paper to trace over the features you plan to make raised.
Turn the tracing paper over and rub the back of it with something hard like a pen lid or glue stick. The marks will transfer to the cardboard (a separate piece of cardboard).
If you plan to make some features stand out more than others, you’ll need to make a few copies of those features, using the same tracing paper method. Think of these as layers, each piece will be layered on top of one another to make them stand out more.

4. Cut out the cardboard facial features
Cut out all your facial feature pieces, and arrange them in place.
5. Layer the cardboard pieces
Glue little slices of cardboard in between layers to make some features pop out even more. Glue the rest of the features onto the main face.
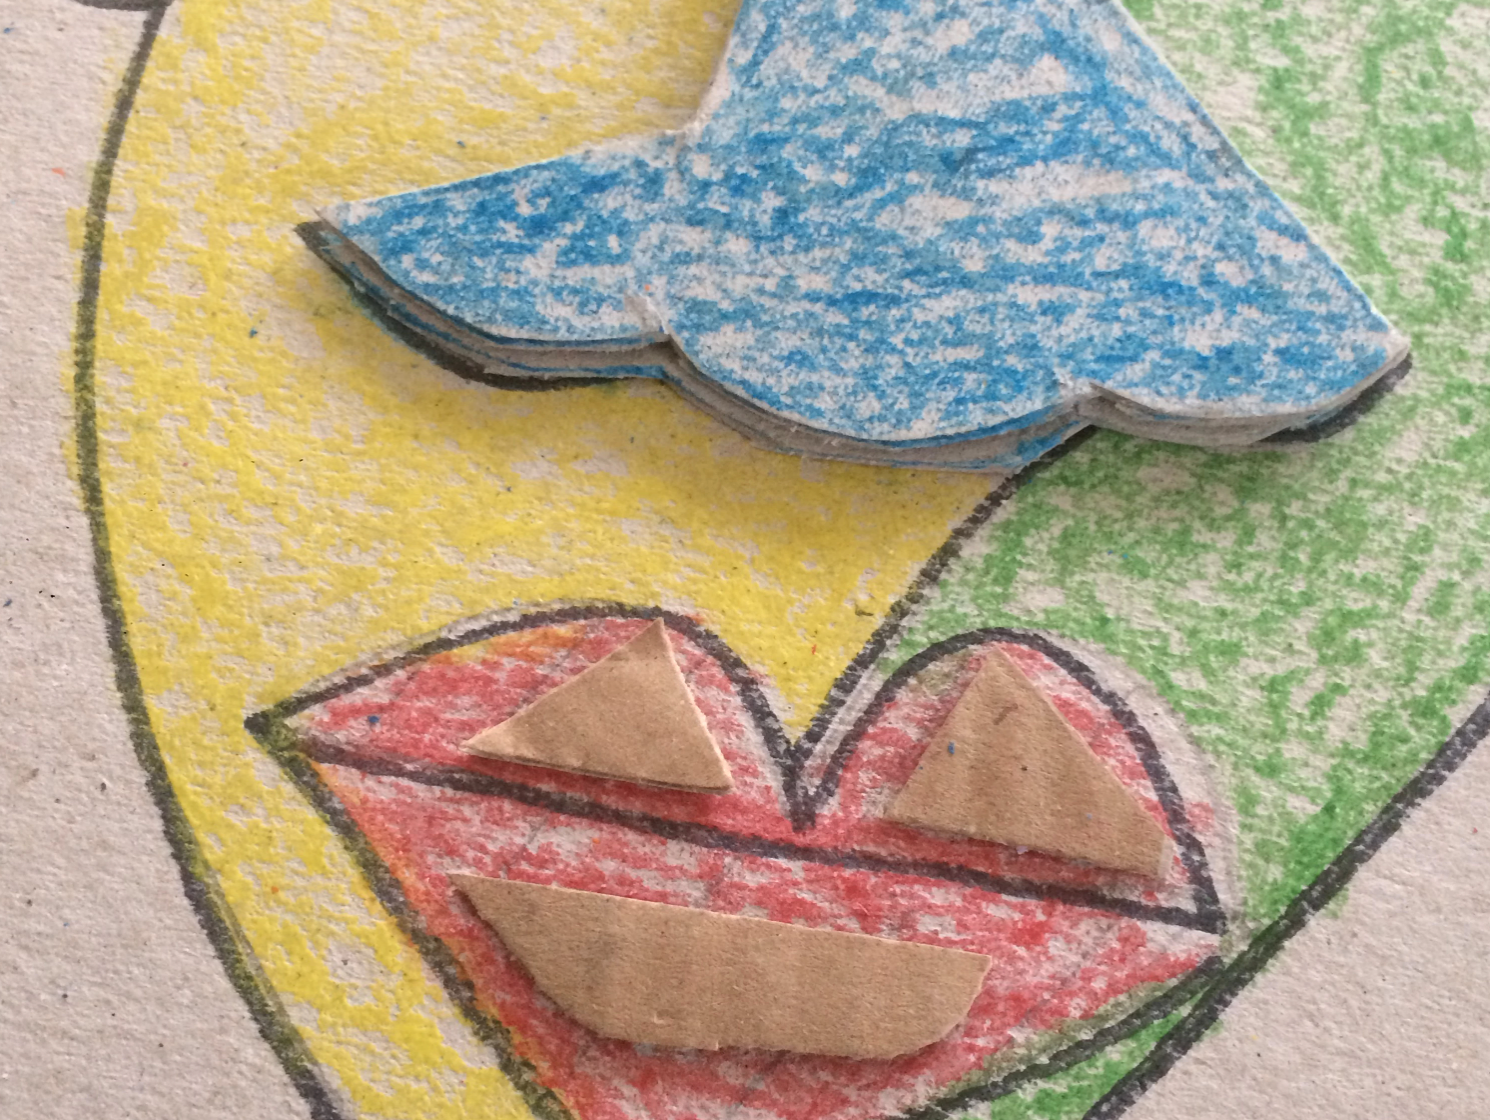
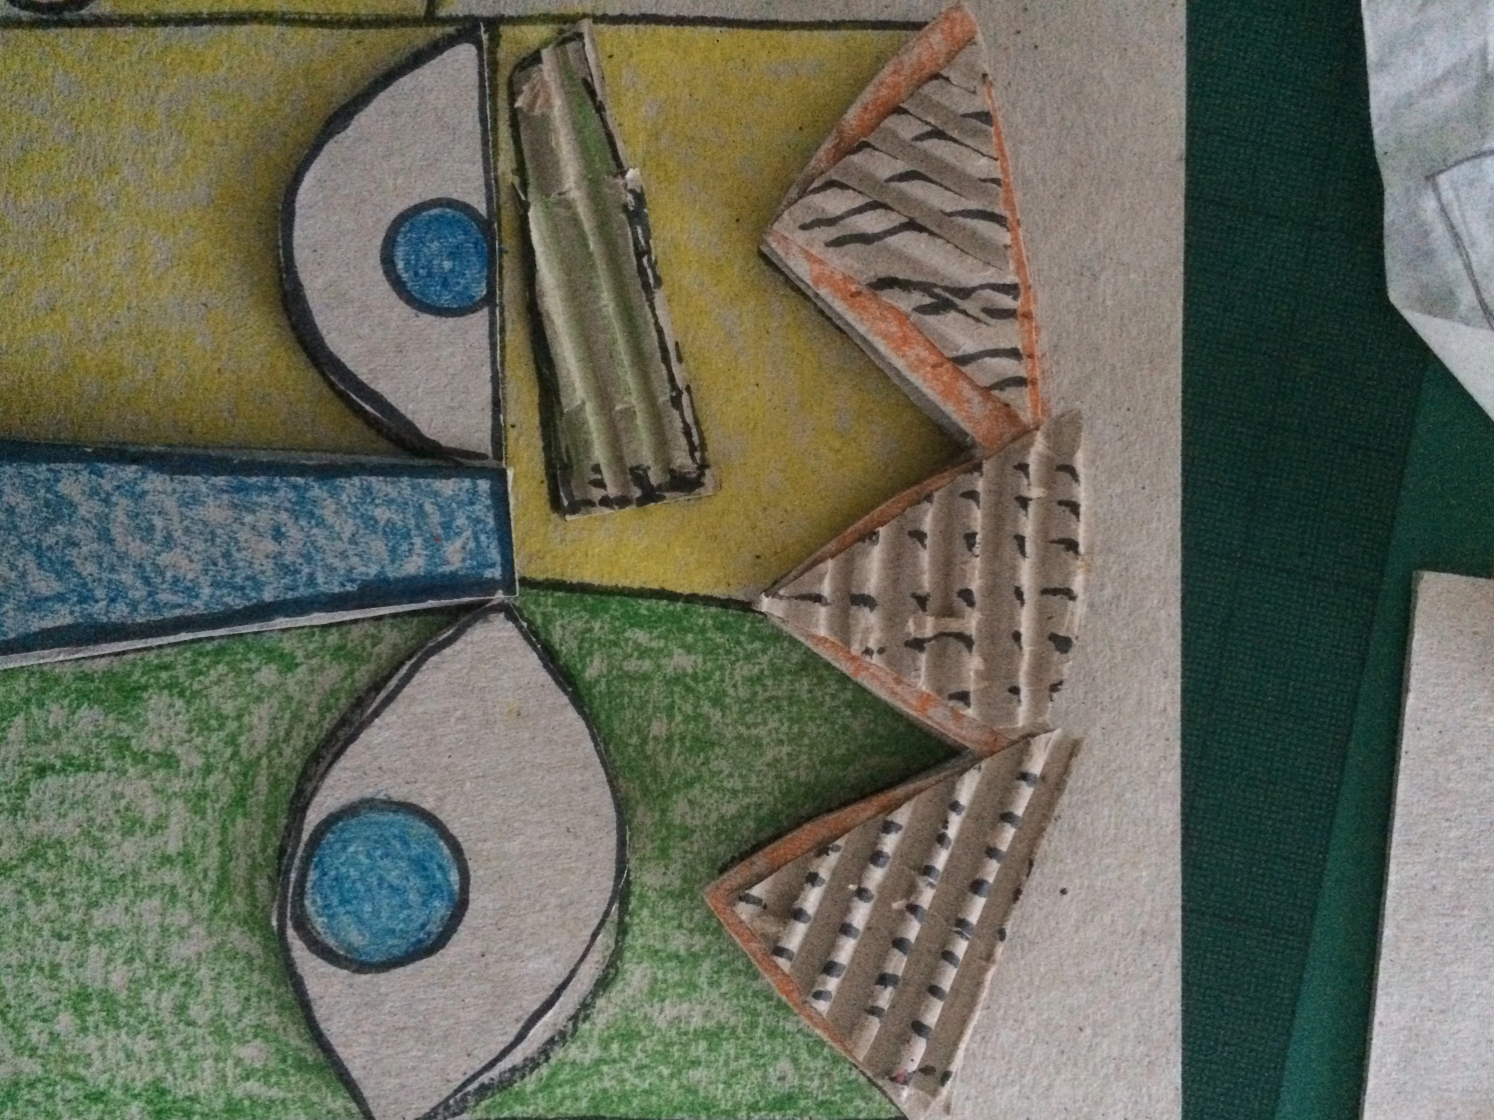
6. Add some texture
Removing some top paper layers of the cardboard to reveal the corrugated insides. Use that for added texture to really make the mask pop!
7. Colour things in!
Colour the face and features in with
